This obviously delights a Drama teacher.
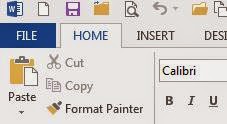
In Office 2013 the ribbon holds all the commands to work on your file.
But when you want to work with the file - you now have to go backstage - well, that's what Microsoft calls the behind-the-scenes area. It lets you print, open, save, share etc etc.
You get to the backstage are by selecting the FILE tab.
When you click this (or Alt F if you like keyboard short cuts) the file you are working on temporarily disappears and the screen looks something like this.
Click any of the left side options to do different things.
To go back to your document? Simply click on the arrow top left.
Monday, 10 November 2014
My Word! Favourite Things About Word 2013
Not a huge amount has changed in the new version of Word. there are new and improved features - but is more about the look and feel of the program - so users shouldn't find it to arduous a switch.
So - Some of my favourite things?
The Design Tab
If you find a look that you'd like to use consistently - use the set as default option.
Yes - this was available before - but now it is all in one easy to find place. There is also heaps more designs to choose from.
Read Mode
Reading or previewing a document see Word automatically resize it into a full window. Click the onscreen arrows to flip through the pages (or swipe if you are on touch screen).
Editing a PDF
So a PDF file is designed to be viewed on any computer - is great to use if you are sending the document to someone and you are uncertain where they have the fonts installed like you - or if you are concerned that formatting may go out the window. They are designed for viewing, rather than editing, so are perfect for a final version that does not need any changes.
To do this.
Select the FILE tab
Backstage view will appear.
Click Open
Locate and open the PDF file you want.
A dialogue box will appear to confirm you want to do this. Click OK.
Edit as normal.
When you are ready to save, locate and select the Save command on the Quick Access Toolbar.
The Save As dialogue box will appear. Select your location, file name and file type (using the drop down box). You can choose to save as word or PDF or a myriad of other types.
What is OneDrive?
Basically it is your storage in the sky (or the cloud).
Office 365 Education users get 1TB of space in OneDrive for business.
With OneDrive you can do
- create and share Microsoft Office files
- upload all sorts of files
- find files others have shared with you
- download copies of files
- collaborate on documents
Here's the official tutorial -
So - how do I work it?
Click on OneDrive from your 365 main page (on the ribbon at the top of your screen or the blue double cloud icon).
This will take you to your OneDrive for Business account.
You will see the following options on the left of your screen. It is pretty self explanatory - and you will have a description box appear if you hover your mouse over any section.
Search OneDrive - type the name of one of your documents to search for it
Documents - All the files you have created or uploaded to Onedrive
Shared with me - Files other users have shared with you
Followed - Documents you have followed to get regular updates on
Site Folders - Folders for KKHS groups your belong to and sites you follow (to be enabled in 2015)
Recycle Bin - Deleted files
Recent Documents - A list of files you last accessed or worked on
What You Can Do
New - Create new Word, PowerPoint, Excel, OneNote, Excel Survey file. Creates new folders.
Upload - Select files from you computer to upload to OneDrive.
Sync - Synchronization of online files with local files on you computer.
Edit - Select a file, then click edit to open and edit it.
Manage - Select a file and click manage to rename, delete, view and more.
Share - Select a file and click share to open and sharing menu to share the file with others.
Subscribe to:
Comments (Atom)


